Independently Owned, Locally Grown, Community Loved


While it might seem like a big job, refreshing your walls can be achieved in 4 basic steps and it’s an easy way to refresh or completely change the look and feel of a room. Pick a room for each weekend, put on your favourite music and get painting!
Before any paint tin gets opened, investing in the right tools for the job will not only stand you in good stead for your current paint job but any future projects. Here is a list of equipment you will need before getting started: Bucket & sponge, Sugar Soap, All Purpose Filler, Masking tape, Paintbrush, Cloth, Drop sheet, Sandpaper & block, Stirrer, Roller & tray, Extension pole, Interior (available in Matt, Low Sheen, Semi-gloss, Gloss), and all can be found at 100 Herbert Steet's Mitre10!
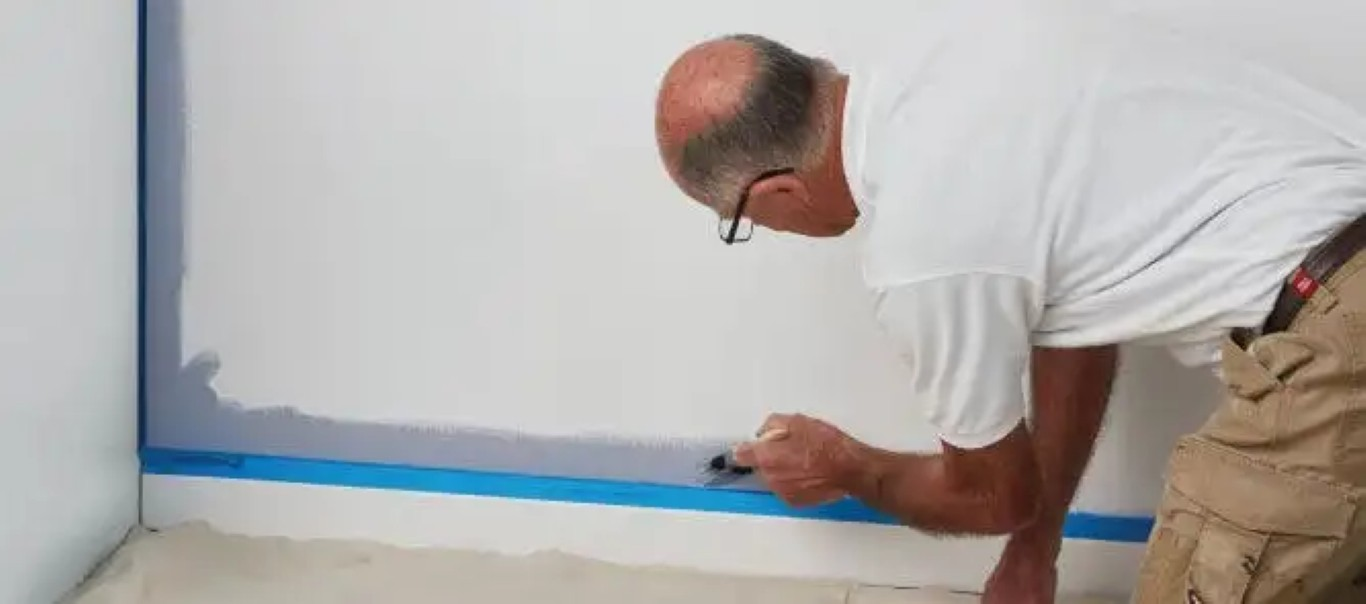
1. Prep - Prepping your walls properly will make the painting process a much easier one with a great result. Cover or remove furniture and lay down a drop sheet. To prepare the walls: wash down with Sugar Soap, fill any cracks with All Purpose Filler (allowing 30 minutes for dry time), sand back and dust off. Spot prime any patches with Multi Prep. You will then need to mask the trims for cutting in. This means putting masking tape along the edge of the wall, skirting boards or cornices so that the neighbouring wall, floor or ceiling does not get any unwanted paint on it.

2. Cut In - Cutting in means painting the corners or around fiddly bits like vents and light fittings with a paintbrush. Basically, spots that you wouldn’t be able to reach with a paint roller. Before dipping in your paintbrush to paint, mix the paint with a stirrer in a circular lifting motion.
3. Paint - Now it’s time for the fun part, load the roller with an even amount of paint. Start at the left edge of the wall and roll in an overlapping ‘W’ shape from top to bottom, this ensures even distribution of the paint.

4. Lay Off - Once you have applied 3-4 rollers full of paint, and before the paint has dried, it is time to lay off. This means rolling the roller (when it is ready for more paint, not loaded with paint) with no pressure in a straight line (vertically) starting at the top to ensure even coverage. Continue this process until you have completed the entire wall or section of wall.

There you have it! It's as simple as those four steps and the more you paint, the faster and more efficient you'll become. If you have questions about any part of the process or need advice for your next project come and chat in store at 100 Herbert Steet, Ingahm, Mitre10.

Publishers Indemnity. Any individual or entity that places advertising, supplies copy material, or submits editorial content to Life Publishing agrees and undertakes to ensure that all such material:- Does not infringe upon any copyright, trademark, or other intellectual property rights;- Is free from any content that could be considered defamatory, libelous, or slanderous;- Does not infringe upon any rights related to privacy or breach of confidence;- Contains no obscene, indecent, or otherwise unlawful material;- Complies fully with the Trade Practices Act and all other applicable laws, regulations, or statutes. Furthermore, by submitting or placing such material, these individuals or entities agree to indemnify and hold harmless the publisher, Life Publishing and Events Pty Ltd, and/or its agents from and against any and all investigations, claims, demands, liabilities, damages, costs, or judgments arising out of or in connection with the material provided. All material is believed to be accurate at the time of printing and remains the copyright of Life Publishing and Events Pty Ltd.
© 2026 Life Publishing Group Ltd.


.jpg)